Man, do I love a good deal! Especially when I can see SO much potential in something the first time I lay eyes on it. Well, the other day I met a friend for lunch and afterward we decided to hit up my favorite thrift store (remember the one where I got my birthday present?). We wandered through a few sections and then almost as if there was a divine light shining down on them from above, I saw them. A set of beautiful "well-loved" dining room chairs. Exactly what I was looking for. Of course they would be the only pieces of furniture in the store that weren't priced...I began to fret, remembering the "No Tag, No Sale" sign as I walked in. But a nice worker wandered by and offered to go find the pricing gun to come back and tag them for us. He walked in back while we stood there waiting, ready to throw an elbow or two if needed to protect our fabulous find. We stood there. And stood there. He seemed to have forgotten about us. Finally another very talkative worker came by and struck up a conversation with us about how lovely the chairs were. I mentioned we were waiting for someone to get a price on them for us and she replied, "Oh, no problem - they're $8 a chair...I'll tell Suzie up front". What? Were they seriously only $8 each??? I couldn't believe it. My friend Heidi and I quickly loaded 4 of them into carts and wheeled them up front to pay. At the check out we found out that all furniture that day was an additional 25% off. Even better! So, my 4 chairs rang up at $6.75 a piece. Major score.
Here's a shot of the beauties (and a bonus shot of a single chair) right after I unloaded them out of my super hip minivan:
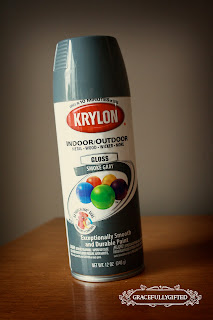
Now the fun part - re-doing them! I decided to reupholster the seat cushions because they were just a little bit nasty in my opinion. Not a huge fan of faux leather covered in someone else's crusties. Ish. But first I decided to paint the chairs. At first I thought it'd be fun to paint them different colors, but then when that didn't seem to make the face of my conservative-decorator husband light up, I figured I better stick with painting them a "safe" color. Black it was - and after a couple of busy days running here and there, and painting while we stopped home for a couple hours at a time, they were finally all 4 painted. I'd found the perfect fabric at Jo-ann's...which sadly was NOT on sale and cost almost as much as the chairs. But whatever. It's what I was envisioning in my head when I saw the chairs in the thrift store. I whipped out the trusty staple gun and went to town re-covering the chairs while my daughter performed a concert on her stage in the playroom...it was pretty awesome.
Here's a close-up shot of the spectacular new seat cushions:
Time for the big reveal - drumroll please...
I absolutely LOVE how they turned out!!! And here's the best part...I was looking at some IKEA chairs, but those bad boys were $70 a chair. Well, the breakdown of my project came out like this:
Chairs - $28.62
Fabric - $23.48
Paint - $12.78
Project Total: $64.88 for 4 super cool chairs...that are MUCH sturdier and larger in size than any IKEA chair.
There you have it folks...another thrift store SCORE.


